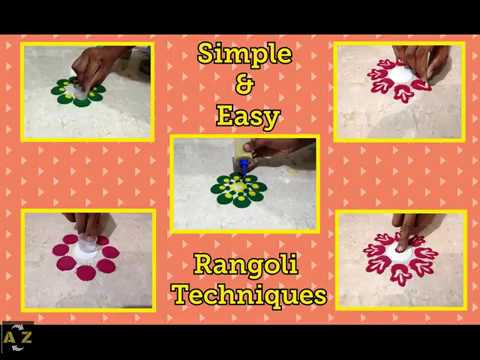
In the previous part, we have seen how to make simple and easy rangoli using bangle. In this part, we will see techniques of using Dhakkan and Fork to make awesome rangoli designs.
पिछले भाग में, हमने देखा है कि कैसे चूड़ी का उपयोग करके सरल और आसान रंगोली बनाना है। इस भाग में, हम शानदार रंगोली डिज़ाइन बनाने के लिए ढक्कन और फोर्क का उपयोग करने की तकनीकें देखेंगे।
Namaste Guys!! Welcome to A 2 Z Guides!! Let's discuss in detail...
नमस्ते दोस्तों !! ए 2 जेड गाइड में आपका स्वागत है !! चलो विस्तार से चर्चा करते हैं।
Dhakkan:-
Usually, we call dhakkans to the people who are worthless. But actual dhakkans are not only useful to store food and beverages safely but also very very very useful in the case of Rangoli making. Let's see how they play an important part in making rangoli designs.
आम तौर पर, हम उन लोगों को ढक्कन कहते हैं जो बेकार हैं। लेकिन असली ढक्कन न केवल भोजन और पेय पदार्थों को सुरक्षित रूप से स्टोर करने के लिए उपयोगी हैं बल्कि रंगोली बनाने के मामले में भी बहुत उपयोगी हैं। चलो देखते हैं कि वे रंगोली डिज़ाइन बनाने में एक महत्वपूर्ण भूमिका किस तरह निभाते हैं।
Let's check out some examples of easy techniques using dhakkans...
आइए ढक्कन का उपयोग करके आसान तकनीकों के कुछ उदाहरण देखें ...
Flower Rangoli Using Dhakkan
Example 1
Step 1:
As shown in Picture 1.1, place the dhakkan and start pouring rangoli at the outside edges of the dhakkan. Then remove the dhakkan and press those dots downward to create circular shape. (As shown in Picture 1.2)
Picture 1.1
Picture 1.2
जैसा कि Picture 1.1 में दिखाया गया है, ढक्कन रखें और ढक्कन के बाहरी किनारों पर रांगोली डालना शुरू करें। फिर ढक्कन को हटा दें और गोलाकार आकार बनाने के लिए उन बिंदुओं को नीचे दबाएं। (जैसा कि Picture 1.2 में दिखाया गया है)
Step 2:
As shown in Picture 1.3, pour different color rangoli on the edge portion of the circle. Then use that dhakkan to give circular shape to those dots. (Picture 1.4)
Picture 1.3
Picture 1.4
जैसा कि Picture 1.3 में दिखाया गया है, सर्कल के किनारे पर विभिन्न रंग कि रंगोली डालें। फिर उन बिंदुओं पर गोलाकार आकार देने के लिए उस ढक्कन का उपयोग करें। (Picture 1.4)
Step 3:
As shown in Picture 1.5, pour different color dots next to inside border of all circles. Repeat the last step with a different color.
Picture 1.5
Picture 1.6
जैसा कि Picture 1.5 में दिखाया गया है, सभी सर्कल के अंदर की सीमा के बगल में विभिन्न रंग बिंदु डालें| अलग रंग के साथ अंतिम चरण दोहराएं
Step 4:
Now put the earbud at the center point and slowly try to cut those last 2 dots in half.
Picture 1.7
अब केंद्र बिंदु पर इयरबड डालें और धीरे-धीरे उन अंतिम 2 बिंदुओं को आधा में कटौती करने का प्रयास करें|
Example 2 Step 1: As shown in Picture 2.1, place the dhakkan and start pouring rangoli at the outside edges of the dhakkan. Then remove the dhakkan and press those dots downward to create circular shape. (As shown in Picture 2.2)
Picture 2.1
Picture 2.2
जैसा कि Picture 2.1 में दिखाया गया है, ढक्कन रखें और ढक्कन के बाहरी किनारों पर रांगोली डालना शुरू करें। फिर ढक्कन को हटा दें और गोलाकार आकार बनाने के लिए उन बिंदुओं को नीचे दबाएं। (जैसा कि Picture 2.2 में दिखाया गया है)
Step 2: As shown in Picture 2.3, pour some rangoli at the center and with the use of dhakkan press it to create a circular shape. (As shown in Picture 2.4)
Picture 2.3
Picture 2.4
जैसा कि Picture 2.3 में दिखाया गया है, केंद्र में कुछ रंगोली डालें और ढक्कन के उपयोग के साथ इसे गोलाकार आकार बनाने के लिए दबाएं। (Picture 2.4 में दिखाया गया है)
Step 3:
With the help of earbud start making petals shapes. (As shown in Picture 2.5) Now use that earbud to create some gap at the center.
Picture 2.5
Picture 2.6
इयरबड की मदद से पंखुड़ियों के आकार बनाना शुरू करें| (जैसा कि Picture 2.5 में दिखाया गया है) अब केंद्र में कुछ अंतर बनाने के लिए उस इयरबड का उपयोग करें|
Step 4:
Finally, pour a different color at the center gap & push them gently using a finger.
Picture 2.7
अंत में, केंद्र के अंतराल पर एक अलग रंग डालें और उन्हें उंगली का उपयोग करके धीरे-धीरे दबाएं।
Fork:-
It contains two or more prongs used for lifting food to the mouth or holding it when cutting. No, It is not a food article and we are not changing the topic. We are going to show you how to use its prongs to create awesome rangoli designs.
इसमें दो या दो से अधिक कांटे होते हैं जो मुंह में भोजन उठाने या काटने के दौरान इसे पकड़ने के लिए उपयोग किए जाते हैं। यह एक खाद्य लेख नहीं है और हम विषय को बदल नहीं रहे हैं।हम आपको यह दिखाने जा रहे हैं कि इसके कांटे का उपयोग कैसे करें और शानदार रंगोली डिज़ाइन कैसे बनाएं।
Flower Rangoli Using Fork and Plate
Step 1:
As shown in Picture 3.1, place the plate and start pouring two rangoli dots at a similar distance at the outside edges of the plate. Then remove the plate and with the help of fork start creating the petal shapes. (As shown in Picture 3.2)
Picture 3.1
Picture 3.2
Step 2:
Now start pouring different color dots at the inside border of each petal. Then with the help of dhakkan press them gently to create a circle.
Picture 3.3
Picture 3.4
अब प्रत्येक पंखुड़ी की अंदर की सीमा पर विभिन्न रंग बिंदु डालना शुरू करें। फिर ढक्कन की मदद से उन्हें धीरे-धीरे एक सर्कल बनाने के लिए दबाएं।
Step 3:
As shown in Picture 3.5, pour some rangoli at the center and with the use of dhakkan press it to create a circular shape. (As shown in Picture 3.6)
Picture 3.5
Picture 3.6
जैसा कि Picture 3.5 में दिखाया गया है, केंद्र में कुछ रंगोली डालें और ढक्कन के उपयोग के साथ इसे गोलाकार आकार बनाने के लिए दबाएं। (Picture 3.6 में दिखाया गया है)
Step 4:
Finally, pour some different color rangoli on that center circle and with the use of dhakkan press it to create a small circular shape on that big circle.
Picture 3.7
Picture 3.8
That's it for today. See you soon where we will see Simple and Easy Rangoli Techniques using Comb and Plate. If you like this article helpful then do share it with your friends and family.
आजके लिए इतना ही। जल्द ही मिलेंगे जहां हम कंघी और प्लेट का उपयोग करके सरल और आसान रंगोली तकनीकों को देखेंगे। अगर आपको यह लेख उपयोगी लगता है तो इसे अपने दोस्तों और परिवार के साथ साझा करें।
In case if you haven’t checked out Part 2 of “Making Rangoli is Very Simple and Easy” then here is its link:-


 Reviewed by A 2 Z Guides
on
Tuesday, November 06, 2018
Rating:
Reviewed by A 2 Z Guides
on
Tuesday, November 06, 2018
Rating:


Nice one and easy to make Rangoli
ReplyDeleteThanks for reading and appreciation!
ReplyDeleteNyc...its actually looking easy!
ReplyDeleteNice one..... :)
ReplyDeleteThanks for reading and appreciation!
Delete